For Machine Learning beginners who just know about basic agorithms and want more - get involved in Computer Vision projects, cat & dog recognition is a fairly straightforward problem that everyone would solve when stepping in Computer Vision area (beside MNIST - Hand written digits).
Today I will build a model to classify whether a cat or a dog is in a particular image. I hope it could help you to understand the basic intuition about Computer Vision. So let’s get started now!
Download dataset
First, go to Kaggle through this link, you will find the cat & dog dataset here.
(For someone who doesn’t know about Kaggle, it is a platform where you can practice your ML skills. At Kaggle, you will work with real world problems and learn the experiences from other practitioners. After grabbing some specific understanding about Machine Learning, I encourage you to take part in this platform to develop your skill further).
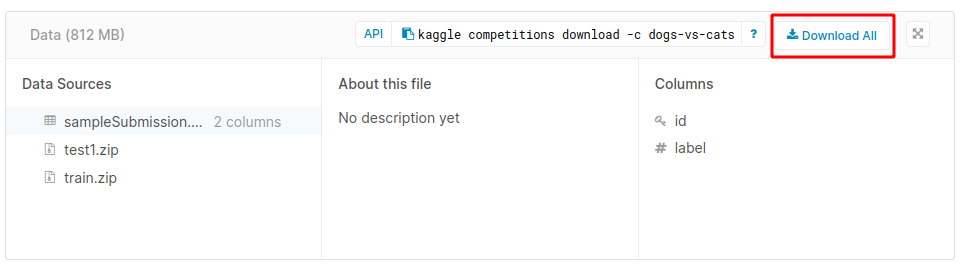
After that, download your dataset by clicking “Download all” button (image below).
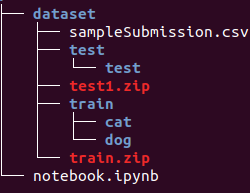
Directory structure
I move all downloaded data to dataset folder for importing concisely. And a notebook will also be created in the project level.
In this tutorial, we will use ImageDataGenerator in Keras library. It needs a correct directory structure when using its method because it will use folder names to indicate the labels. Thus we need to categorize our training images.
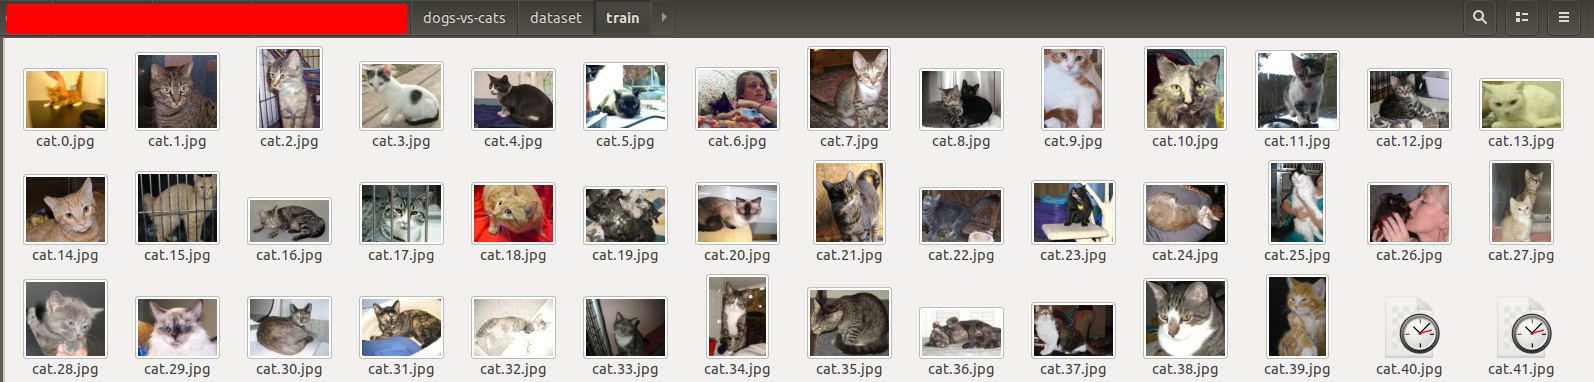
Current structure looks like this:
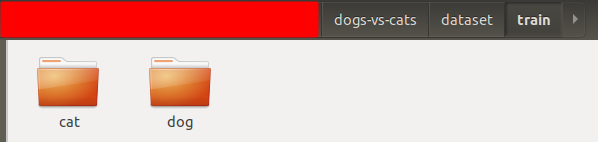
Expectation:
Don’t get nervous, we will write a simple python script to move each image to its respective directory soon.
In the end, our project structure will look like this:
Classify our training images
1
2
3
4
5
6
7
8
9
10
11
12
13
14
15
16
17
18
19
20
21
22
23
import os
import shutil
from os.path import isfile, join

# Change our location to dataset/train directory
os.chdir('dataset/train')

# Create directories if not exist
if not os.path.exists('cat'):
    os.mkdir('cat')

if not os.path.exists('dog'):
    os.mkdir('dog')

# List all files
files = [f for f in os.listdir() if isfile(join(f))]

for file in files:
    # Compare file name and use shutil package to move file into matched directory
    if file[0:3] == 'cat':
        shutil.move(file, 'cat')
    else:
        shutil.move(file, 'dog')
Import the libraries and analyse
1
2
3
4
5
6
7
8
9
10
# Import libraries
import matplotlib.pyplot as plt
import numpy as np
import cv2
import os

from tensorflow.keras.models import Sequential
from tensorflow.keras.callbacks import EarlyStopping
from tensorflow.keras.preprocessing.image import ImageDataGenerator
from tensorflow.keras.layers import Conv2D, MaxPooling2D, Dense, Dropout, Flatten
For the first 4 lines, you probably already knew what these libraries are used for. And if you wonder about what the rest can do, don’t worry, I will explain specifically about each in the next couple of articles.
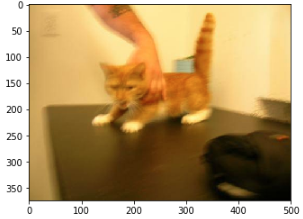
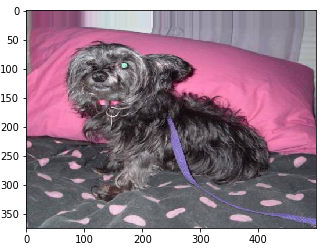
Then we will plot the first cat in the training set:
1
2
3
4
cat0 = cv2.imread('dataset/train/cat/cat.0.jpg')
cat0 = cv2.cvtColor(cat0, cv2.COLOR_BGR2RGB)

plt.imshow(cat0)
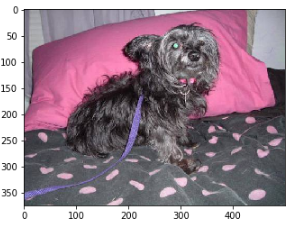
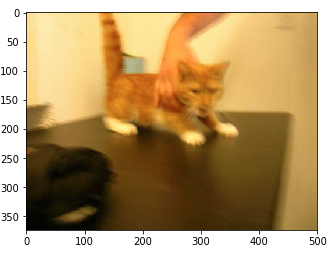
And also the first dog:
1
2
3
4
dog0 = cv2.imread('dataset/train/dog/dog.0.jpg')
dog0 = cv2.cvtColor(dog0, cv2.COLOR_BGR2RGB)

plt.imshow(dog0)
Augment the data
Data augmentation is an important process involved in the lack of data in small datasets. With a little transformation, we can turn an image to multiple different ones but are still clear enough to be learned by our model.
I would like to list some methods to enhance data for images:
- Horizontal and Vertical Shift
- Horizontal and Vertical Flip
- Rotate
- Adjust brightness
- Zoom in and Zoom out
- …
We can see an example with our heroic lion below:
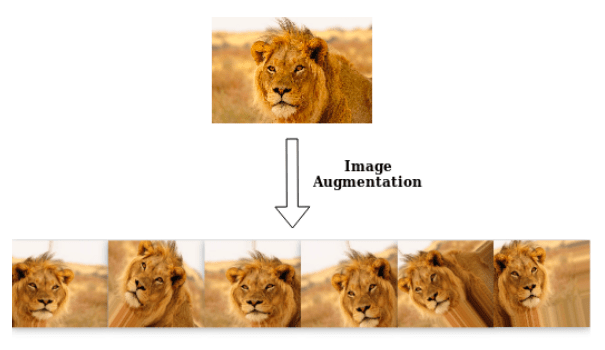
Characteristics:
- All of the images are cropped into a rectangle shape
- The lion in the first transformed image is flipped in the horizontal side.
- The second one is rotated a bit
- And so on….
Now we will get into the data augmentation process with Keras, which needs fine-tuning and measuring many times to achieve a good result.
1
2
3
4
5
6
7
8
9
# Create a generator
image_gen = ImageDataGenerator(width_shift_range=0.1,
                               height_shift_range=0.1,
                               rescale=1/255,
                               shear_range=0.2,
                               zoom_range=0.2,
                               horizontal_flip=True,
                               validation_split=0.2,
                               fill_mode='nearest')
1
2
# Let try our generator with dog0
plt.imshow(image_gen.random_transform(dog0))
1
2
# Let try our generator with dog0
plt.imshow(image_gen.random_transform(cat0))
1
2
3
4
5
6
7
8
9
10
11
12
13
14
15
16
# Load our training and test data
directory = 'dataset/train'
batch_size = 32
image_shape = (127, 127, 3)

train_data = image_gen.flow_from_directory(directory,
                                          target_size=image_shape[:2],
                                          batch_size=batch_size,
                                          class_mode='categorical',
                                          subset='training')

test_data = image_gen.flow_from_directory(directory,
                                          target_size=image_shape[:2],
                                          batch_size=batch_size,
                                          class_mode='categorical',
                                          subset='validation')
Build and train the model
It is probably the most exciting task for many of you. Now we will create a 8-layers model with the increasing filters after every couple of conv layer.
1
2
3
4
5
6
7
8
9
10
11
12
13
14
15
16
17
18
19
20
21
22
23
24
25
26
27
28
model = Sequential([
    Conv2D(filters=32, kernel_size=(3,3), padding='same', activation='relu', input_shape=image_shape),
    Conv2D(filters=32, kernel_size=(3,3), padding='same', activation='relu'),
    MaxPooling2D(pool_size=(2, 2)),
    Dropout(0.25),

    Conv2D(filters=64, kernel_size=(3,3), padding='same', activation='relu'),
    Conv2D(filters=64, kernel_size=(3,3), padding='same', activation='relu'),
    MaxPooling2D(pool_size=(2, 2)),
    Dropout(0.25),

    Conv2D(filters=128, kernel_size=(3,3), padding='same', activation='relu'),
    Conv2D(filters=128, kernel_size=(3,3), padding='same', activation='relu'),
    MaxPooling2D(pool_size=(2, 2)),
    Dropout(0.25),
    Flatten(),

    Dense(500, activation='relu'),
    Dropout(0.5),

    Dense(2, activation='softmax')
])

model.compile(loss='categorical_crossentropy',
              optimizer='adam',
              metrics=['accuracy'])

model.summary()
Here is our summary:
1
2
3
4
5
6
7
8
import warnings
warnings.filterwarnings('ignore')
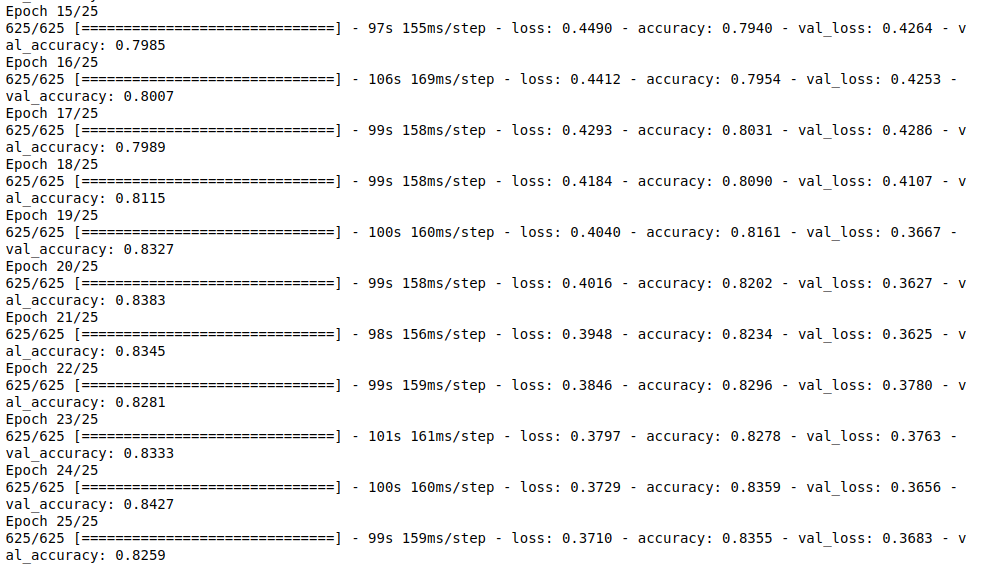
results = model.fit_generator(train_data,
epochs=25,
validation_data=test_data,
validation_steps=test_data.samples//batch_size,
steps_per_epoch=train_data.samples//batch_size)
It is very delightful when our model achieve a quite high accuracy rate. In practice, if we don’t use any pre-trained models, we will spend a huge amount of time to figure out the suitable model for this problem.
1
2
# Save our model for building our app
model.save('model.h5')
Plot the learning history
1
2
3
4
5
6
7
8
9
10
fig, ax = plt.subplots(1, 2, figsize=(15, 15))
ax[0].plot(results.history['accuracy'], label='Train accuracy')
ax[0].plot(results.history['val_accuracy'], label='Validation accuracy')
ax[0].legend(['Train accuracy', 'Validation accuracy'])

ax[1].plot(results.history['loss'], label='Train loss')
ax[1].plot(results.history['val_loss'], label='Validation loss')
ax[1].legend(['Train loss', 'Validation loss'])

plt.show()
